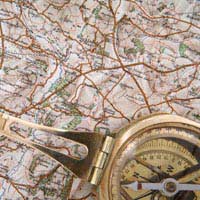
Beginner's Guide to Map Reading and Grid References

Hiking, of course, is great fun and wonderful exercise, but you can get so much more out of it if you really know where you’re going, and it means you also eliminate the danger of ending up lost on the hills. You can’t always judge your instincts, which is why a good compass, an Ordnance Survey map, and the ability to use them both properly are excellent skills for anyone going out hiking. Of course, you can buy a GPS unit, but remember that batteries don’t last forever, and they also break down – there’s no substitute for some basic map reading and orienteering knowledge.
What Do You Need?
Before heading out you should make sure you have the correct Ordnance Survey map(s) for the area you’ll be covering, and ideally the most up-to-date versions, since features do change.Additionally, you’ll certainly need a good compass. The orienteering compasses you can buy in camping shops are ideal, with the rectangular base and markings that help you measure accurately on the map. Also carry a watch and a pen or pencil, as well as a torch, so you can read the map at night if you’re caught out.
It’s well worth buying a transparent, waterproof map case that will allow you to easily consult the map and compass in rain and bad weather, which is probably when you’ll need it most.
These tips are nothing more than the very basics. To learn more, there are a number of books or good courses, which are well worth investigating.
The Basic of Map Reading
The OS map really is your friend. It’s a scaled down representation of what’s on the ground, with all the features, either at a 1:25,000 (1cm = 250 metres) or 1:50,000 (1cm = 500 metres) scale. The map itself is divided into squares, each of which represents one kilometre. The map also shows features, such as churches, which you can recognise from the key, as well as the contours of the ground – the steeper a hill, the closer together the contour rings are.With those features, it should be easy to relate what you see on the ground to what’s on the map, once you align the map properly so the features you see match the position of those on the paper. From there you can discover your position on the map quite easily by using the squares. Each block of 100 squares is identified by a two-letter code. By using those letters, along with the number of the square, then taking the markings on the orienteering compass to judge your position within a particular square, you’ll be able to pinpoint your grid reference to within 100 metres, which can be vital if you need to call in assistance for any reason.
The Basics of Using a Compass
On a compass, the needle will always point to magnetic North, and that quality lets you use it to find your way in conjunction with a map. If, for instance, you’re on a path that forks, but with no signs, you can use the compass to align the map, and from there see which trail you need to follow.A compass will also allow you to go on a bearing in your walk, which isn’t as complex as it sounds. It’s simply the angle from north that you want, but you need to bear in mind that what’s shown as North on your map is what’s known as “grid north,” not the magnetic north of the compass. Take your bearing from the grid north on the map, and make your adjustments (the amount will be shown on the OS map). Once you’ve done that, use your compass to establish north on the ground, then follow your bearing. Try it on familiar ground first to become comfortable with it before relying on it to find your way.


Re: Walking on Roads
I have never attempted any form of hiking. This year i am 87, I’m pretty’s fit, I walk with dog between five and. Six miles every day, summer and…
Re: Starting a Walking Club
Hi I'm a naturist from North Wales and wanted to reach out to people that would like to join a clothing optional walk what's the best way…
Re: Starting a Walking Club
Do I need insurance for a walk/run group?. It’s a completely free group so no joining fee or charges. It’s run by volunteers. I don’t…
Re: Join A Walking Club
I need to hike...do something for my self...I love the outdoors and hiking...I need to meet new friends...who injoys the outdoors like…
Re: Starting a Walking Club
What sort of paperwork/ registration/ insurance might you need for walking group?
Re: Join A Walking Club
Hi, Any advice on liability/protecting yourself when setting up a walking club? What if someone hurts themselves? Thanks, Sam
Re: Starting a Walking Club
Hello, Do you know of any software that facilitates putting together walking/hiking clubs programme schedule? I am looking for…
Re: Join A Walking Club
I am looking to join a walking/hiking club in the Southampton/Hampshire area. I am 50 and have signed up for London to Brighton Challenge and…
Re: Join A Walking Club
Looking for a short walk partner n to make friends in tipton area of west midlands
Re: Join A Walking Club
Hi I am 33 and am looking to join a walking club for health and social reasons. I currently live in huntingdonshire.